If you are new to Mac OS X, then taking screenshots could be a lot trickier than you think. Normally in a PC we’ll have an exclusive ‘Screenshot key’ on keyboard but for taking screenshots in Mac OS X we have to use combination of few keys, we’ll see them one by one below.
Simple Tricks For Taking Screenshots in Mac OS X
1. Command + Shift + 3
Use this to take a screenshot of the entire screen and save it as a file.
To save it to the clipboard: Press Command + Control + Shift + 3
2. Command + Shift + 4
Use this to select your desired area to be captured.

You can then take a screenshot of that area and save it as a file on the desktop.

To save it to the clipboard: Press Command + Control + Shift + 4
3. Command + Shift + 4 + Space
Use this to take a screenshot of a specific Window alone and save it as a file. You can select your desired Window which is open and take screenshot.
To save it to the clipboard: Press Command + Control + Shift + 4 + Space
4. Change The Screen Shot File Format
By typing some commands in Terminal you can change the screen shot file format. You can use formats like PNG, PDF, TIFF, GIF, etc.

Launch Terminal and type this command for JPG.
defaults write com.apple.screencapture type jpg
and then type this to restart SystemUIServer so that changes take effect.
killall SystemUIServer
5. Take Screenshots With A Timer
Most of us forget that there is an inbuilt tool for taking screenshots in Mac OS X, it’s called Grab. You can use this to take timer screenshots, yes, timed screenshots!
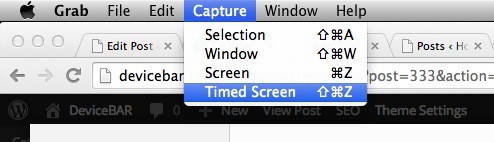
Go to Capture > Timed Screen. It will capture the screen ten seconds after you start the timer.

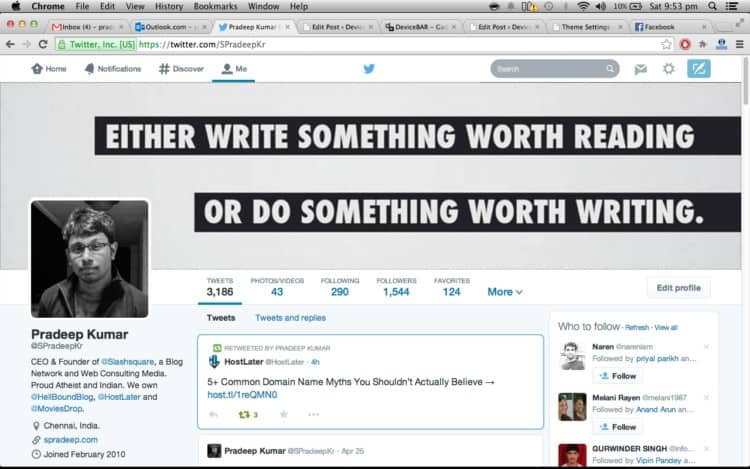
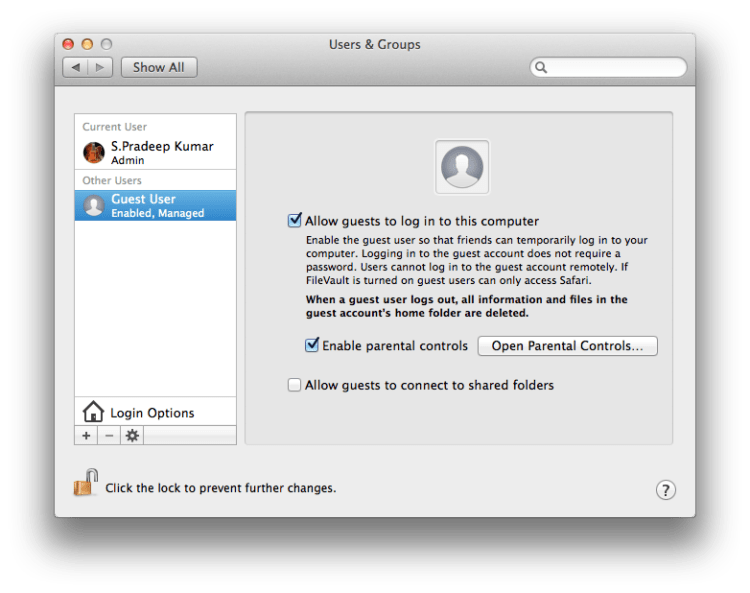
6. Disable Drop Shadows On Window Screenshots
Not everyone is a big fan of drop shadows, so if you want to disable them, head straight to Terminal and type these commands.
defaults write com.apple.screencapture disable-shadow -bool true
After that:
killall SystemUIServer
Now, this is how the screenshots will look without drop shadows, more like plain edges.

Whoa, wait? What if I change my mind, I started to like those drop shadows! You can use these commands to enable them back.
defaults write com.apple.screencapture disable-shadow -bool false
And your default drop shadows layout will be back.

Taking screenshots in Mac OS X is not complicated, it just has some extra functionalities for our own use. Honestly, even I’m new to some features I mentioned here and it was fun using them. Do check them and let us know your views. But don’t try to mess around with Terminal, it is much like Command Prompt in Windows, unless you know your commands don’t work on it.
Oh my ghosshh! I just know the first method for taking screenshots, seriously never knew it has such awesome options!
Really an awesome post. I know that many people are struggling to take screenshots in Mac running OS X I know only the first one and Learned about the remaning ways today. Thanks 🙂
It’s been a year with Mac, yet I Only know 2 of those methods. Really impressive.