If you have an Android device (smartphone / tablet) then you can do something extra than you have been doing usually.
In this article we’ll explain how you can make your Android device connect to the internet over a proxy server. What’s the benefit? Suppose if your college or school has restrictions to access specific websites, say Facebook or 9GAG, then with a proxy server you can easily access them. Or take this example, if you want to view an YouTube video which isn’t available in your country, then this might also help you with that.
A proxy server is a server (a computer system or an application) that acts as an intermediary for requests from clients seeking resources from other servers. (via Wikipedia)
We’ll explain you how to set up a proxy server connection in Android, but you have to find the required proxy server for your use. Finding them is kinda tricky, because most of the popular proxy servers are blacklisted by schools, colleges and companies. But don’t worry, with little bit of Googling you can easily find the correct usable ones for you.
Setting Up A Proxy Server Connection In Android
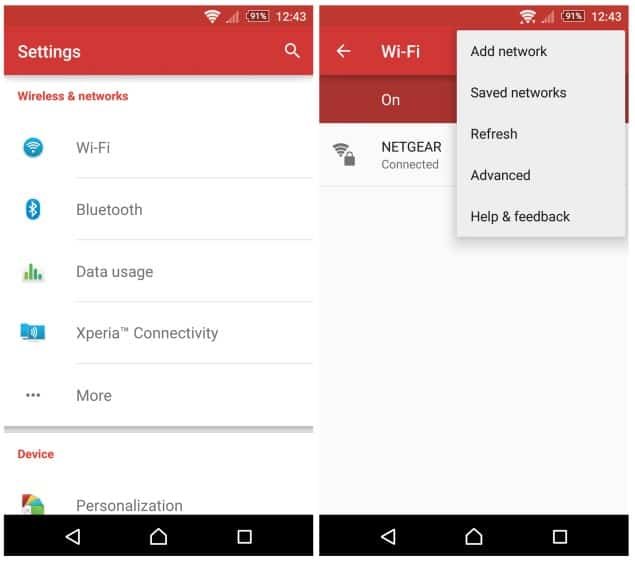
Go to your Settings > WiFi (Wireless & networks)

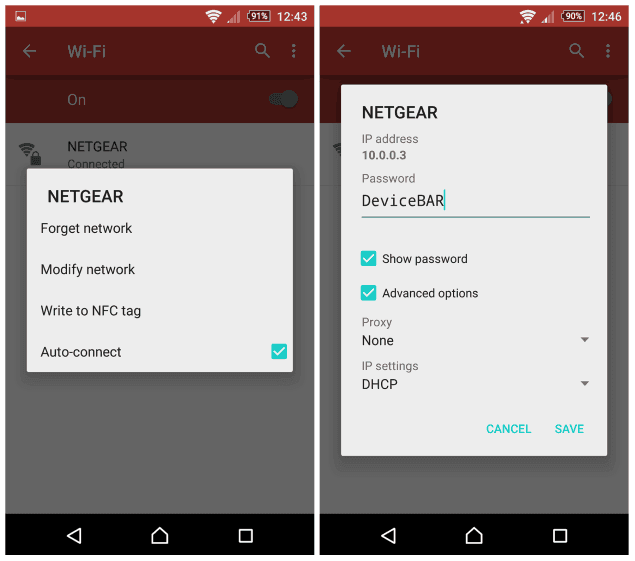
Now, long-press the connection (NETGEAR in my case) you are using. A small pop-up appears now. Find and select “Modify network” option. Now another pop-up opens, check “Advanced options” and the options for proxy server will be displayed.

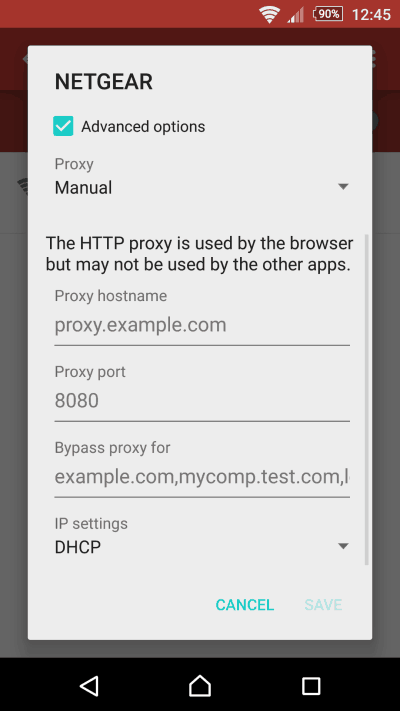
Select the option “Manual” from the dropdown and you’ll get the area for entering your Proxy hostname, Proxy port, and Bypass proxy. You can also change the IP settings here.

That’s it. You just need to enter your proxy server details here and connect to the internet. This proxy server will act as an intermediate.
If you have any queries or if you face any issues, do let us know in the comments below and we’ll help you with that right away.